


How to create The Welkin Suite project from your sources in Git
Ok, we have to admit that at the time of our writing this, we haven't yet released The Welkin Suite Bloom R19, but we'd still like to share with you some of the new great additions that it will introduce so that you will be up to speed by the release. So with that comment out of the way, one of the most very common questions we have had over the past years has been "How to work with my sources that are in Git in The Welkin Suite?" - today we're going to be answering this question.
Step 1. Check your Git repository
In most cases, if you'll open your Git repository, you are surely going to see a picture similar to the screenshot below. And there, you'll have the sources that are in your repository, such as a package.xml and maybe you'll even have some additional folders with your CI or ant scripts there.
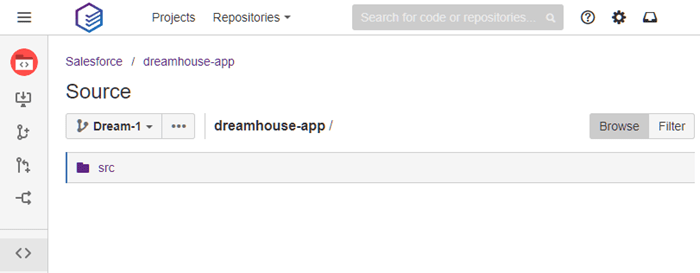
It won't matter how much other stuff you have in your repository, so let's stick with your repository on the image. And if you haven't yet cloned it yet, just do this now, and let's proceed to the next step.
Step 2. Creating The Welkin Suite project
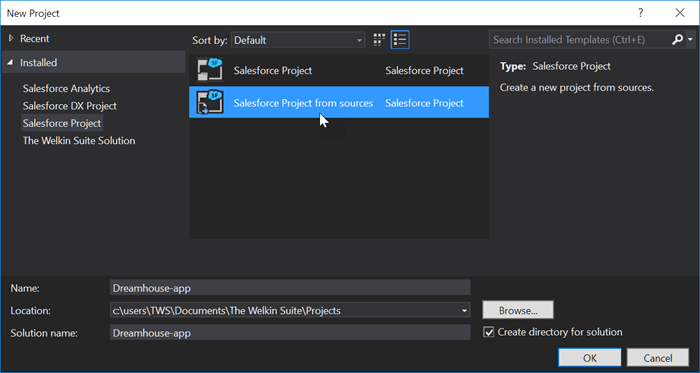
In the Bloom R19 version of the IDE, you will find a new option in the standard project creation wizard, so when you'll open in the Main Menu → File → New → Project you will see an option "Salesforce Project from sources". Now just enter the project name and proceed to the next step.
Ok, so On the next screen you will need to fill in some information. First of all, you will need to point the IDE where your sources are located - you can just copy-paste the path to the 'src' folder, or you can look for it right there in the wizard. After that you'll have two options:
- If you would select the 'Create a project file close to sources' - the IDE will create a .sfproj file in the folder where your 'src' folder is located, and it will work directly with those sources
- If you would select the 'Copy source to project folder' - the IDE will copy that sources to the Location that you've selected in the previous windows, and the sources in the folder that you've selected, won't be modified by the IDE at all
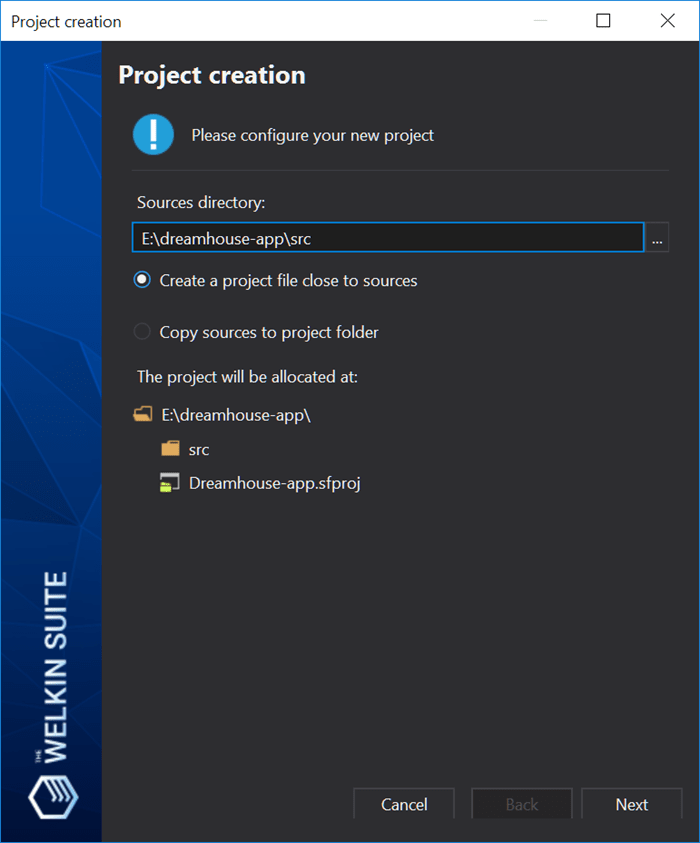
For the current tutorial it's much more interesting to stick with the first option and work directly with your sources from your Git repo, so let's select it and proceed, and take a look what will happen next:
- The IDE will scan the 'src' folder and compare it with the 'package.xml' file that's located in that folder
- If local files and 'package.xml' content match - great, the IDE won't change your package.xml
- If local files are different from what you have in the 'package.xml' file - the IDE will create a 'package.xml.bak' backup of your file, and then it will craft the new one, that matches your local files
- The Welkin Suite will unpack all the static resources and will store the unpacked content in the 'resource-bundles' folder on the same level as the 'src' folder
- Obviously, it will create the project file and store it near the 'src' folder
Once this process completes, the IDE will open your new project and it will notify you that it's not yet connected to any Salesforce organization.
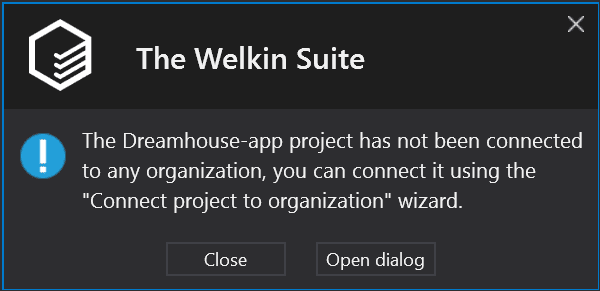
If you'll just close this notification you will be able to read your sources, modify them (even with the Code Assistance functionality), but won't be able to deploy them, or perform some other cool actions like running tests, debugging, etc.
Step 3. Connecting a project with an organization
Also starting from the Bloom R19 version of The Welkin Suite, you will be able to connect your project to any organization in just a couple minutes, so let's see how to do this. You can open the connection wizard using the 'Open dialog' button from the notification in the previous step, or just right click on your project in the Solution Explorer and select the 'Connect to an organization'.

During the first step of the wizard, you will be able to enter your org's credentials or use OAuth to connect to it. This is absolutely the same approach as you've seen previously in the regular project creation process. Once the IDE validates your credentials it will do the following actions:
- Compare the items in your project with your organization, and the local files that are not available in the organization will remain in the project and will be deployed to the org on the first deployment
- Retrieve all matching items (so be prepared, this can take some time depending on the size of your project)
- Calculate the hashsum for each local and retrieved file, and then compare them. Here, we've taken into account your previous feedbacks, so the IDE will 'virtually normalize' line-endings before caclulating hashsums, so it won't show you any false conflicts due to the differences in line-endings.
- Will detect conflicting files
If the IDE detects any conflicts, you'll have multiple options to handle them.

On the 'Conflicts resolution' step, you will see the following information for each of the conflicting files:
- 'Diff' button to see the difference between files
- A checkbox to use a remote version of a file
- File type
- It's path within the project
- The status will show if a local, remote, or merged version of a file will be used in your project after connecting it to the organization
- A 'Merge' button to start an external merge tool to resolve conflicts manually
After you handle all conflicts and finish the wizard - your project will be connected to the organization. All files that are missing from the remote organization, as well as all merged conflicts and files for which you've used the 'Local' version will be automatically added to the 'Pending changes' list and will be deployed to the organization on the first deployment.
Just as a side note - you will also be able to connect your project to any other organization using the same process at any moment later in time.
Step 4. Analyzing project files
After connecting your Git source to an organization, The Welkin Suite will have all the needed information to work with your sources in a usual way.
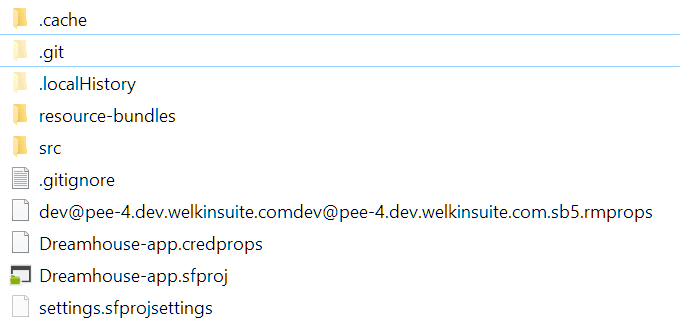
Before committing to the repository, let's go through the files & folders that the IDE have created:
- .cache - stores some cached data for code completion
- .localHistory - automatedd Git repository for The Welkin Suite's Local History functionality
- resource-bundles - unpacked static resources
- .gitignore - The Welkin Suite creates or updates your existing .gitignore to ignore our local history folder
- some_long_filename.rmprops - file that contains hashsums and the last modification date for each file in the project for a connected organization
- project_name.credprops - file that contains information about the org name and username (but not password) that are used for the project
- project_name.sfproj - The Welkin Suite's project file
- settings.sfprojsettings - file with some additional personalized settings for the project, like the state of Lightning & Visualforce previewers, etc.
It is also improtant to note, that from now on the IDE won't store your passsowrd (even in an encrypted way) in a project file - it's stored locally in the secure OS storage.
Step 5. Updating .gitignore
Depending on your flow, you might want or might not want to commit The Welkin Suite's files to your repository, so you might need to update the .gitignore file.
- You can add everything that was created by the IDE to the .gitignore, so only the changes in your sources will be pushed to the repository. This approach works absolutely ok for The Welkin Suite, and you will be able to easily work with your project in the future after you'll pull changes from Git.
- You can add The Welkin Suite's project, but not include the connection details, so your teammates won't use your sandbox, for example. To do this, add the following items to the .gitignore:
- *.rmprops
- *.credprops
- settings.sfprojsettings
- .cache
- You can add everything to your Git repository. This works well when the whole team is working on the same sandbox, but it gets less and less common in Salesforce development now.
Step 6. Updating project after pulling changes from Git
So if you've chosen to use one of the first two options in the previous step, you'll also need to make one more action in the IDE, each time after you switch branches or pull changes from a repository - refresh the project according to sources.
This option can be found in the project's context menu in the Solution Explorer - 'Refresh project according to sources', however, we won't cover it in details for now, as it's a pretty straightforward process, and won't take more than a minute normally.
Let us know what do you think about this flow 

Very straightforward! Guys, I can't wait to try it!
Will there be a checkbox which allows you to overwrite the remote copy of a file with local? Say you've just merged another developers work into your branch and you want to push these changes to your working sandbox.
Hi Peter,
Thank you for your question!
You will be able to do this in two steps :)
Please join the webinar related to the upcoming TWS version to get more details about this process and other new abilities on The Welkin Suite IDE: http://bit.ly/major-update