The beginning of the Declarative Development evolution in The Welkin Suite - sObjects Editor
Today, in Spire R4, we are releasing the first results in terms of the newly adopted course of development of The Welkin Suite Spire - the support for the Salesforce's declarative development - which we believe is soon to become one of the main directions in which Spire will be headed in the future. Salesforce is well-known for it's great point-n-click development capabilities, and with The Welkin Suite Spire R4, we are starting to bring them one level up. Meet our brand new sObjects Editor, and its first part - Field-Level Security editor!
This is a new area for The Welkin Suite, so we encourage you to try it, share it with your fellow administrators or teammates who are working with declarative development, and let us know what you think about this!
sObject's FLS Editor
In Salesforce, data model is regarded as the foundation for each and every piece of functionality and business process - this why we made working on sObjects editing our top priority at the moment. The first component of this new GUI editor is the Field-Level Security tab, which allows you to see all field permissions in a convenient way, and modify some, or all of them with a minimal effort. Let's dive deeper and see how it works.
Displaying FLS
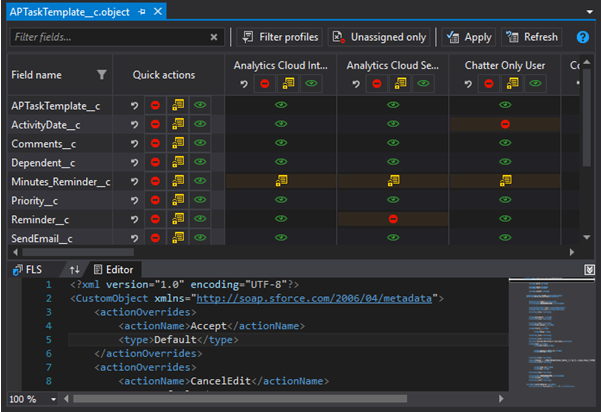
To open the new FLS editor, you just need to open any sObject file from your TWS project, and you will see the editor with two panels:

 FLS editor in the upper part;
- regular
 XML editor in the lower part of the screen.
You can switch them vice-versa, or hide one of the panels that you're not going to work with, using the buttons in the splitter between these panels
When you open it, the FLS editor for an object requests all the information about the available fields and profiles from the org. Once the data is retrieved, it is displayed in the table, in which the columns stand for profiles, rows stand for fields in the current sObject, and the intersection cell shows current FLS settings for that field-profile pair:
 Visible - or "editable", corresponds to the Salesforce's configuration when only "Visible" checkbox is selected
 Read-only - as its name suggests, corresponds to the Salesforce's configuration when both "Read-only" and "Visible" checkboxes are selected
 Forbidden - corresponds to the Salesforce's configuration when both "Read-only" and "Visible" checkboxes are cleared
In real-life development, it quite a common case when a user has 40+ profiles, and an object with 100+ fields. This is way too much information, and your work with it will hardly be quick and painless, so we have added some filtering options to allow you to fine-tune the results that should be displayed:
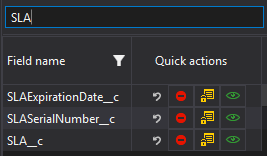
- "Filter fields..." input right above the Fields column allows you to filter which fields should be displayed
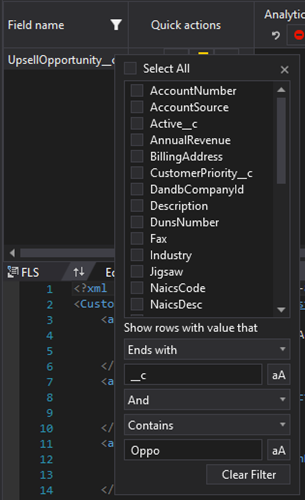
- If you need more advanced criteria for fields filtering, you can always click the filter icon on the "Field name" column header to do this
- Of course, you can filter the profiles as well - for example, hide all Community profiles. To do this, press "
 Filter profiles" button in the editor's toolbar
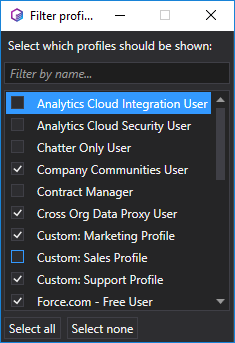
- The next filtering option is to show only the "Unassigned" fields - the fields which only have "Forbidden" status for all their profiles. "
 Unassigned only" button on the toolbar will help you to achieve this.
Very important thing about filtering is that it not only changes what exactly is displayed in the table, it also limits the scope of the quick actions (see below in the Bulk modifying FLS) to apply to only those fields and profiles that are visible.
Modifying FLS
Our developers tend to always create different ways to use TWS' functionality. Modifying FLS values is not an exception:
- The most straightforward way is to click on the icon in the corresponding cell, and it will be cyclically changed to the next one in the following succession - "
 Visible->
  Read-only ->
  Forbidden".
 - You can right-click on any cell and select the necessary FLS option from it.
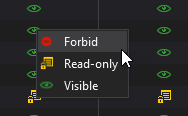
- You can pursue the geek way and just use your keyboard to do this - when the focus is in the FLS tab, press arrow keys on the keyboard to change the selected cell, and then use the keys "1","2", and "3" to set FLS to "Visible", "Read-only", and "Forbidden" respectively.
We want to draw your attention to the fact that changing the settings in the FLS editor does not immediately apply them to the org, or anywhere in the project files. In order to save your FLS changes to the org, you need to press " Apply" button in the editor's own toolbar - this will send the data to your org, and re-download it after this.
Bulk modifying FLS
Undoubtedly, the most common scenario in Salesforce development world is to modify your FLS for at least a couple of profiles for the same field (or a set of fields), or to change the settings for all the fields for the same profile. Due to this, we have different ways to make the mass changes to cover all possible development scenarios:
- To quickly set the same FLS for one profile for all the fields in the object - please press the corresponding button in the column header cell.

- To set the same FLS for one field for all the profiles - press the corresponding button in the "Quick Actions" column in the row with the needed field.
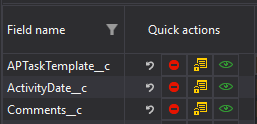
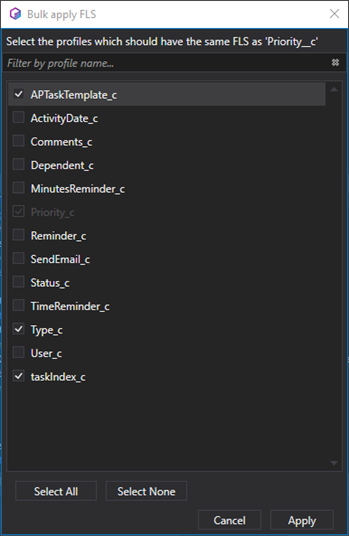
- To apply FLS settings from one profile to a set of other profiles for all the fields - right-click on the column header of the "source" profile, and select "
 Bulk apply to...". In the window that is opened, you can select the profiles which should have the same settings, as the "source" one, and press Apply.
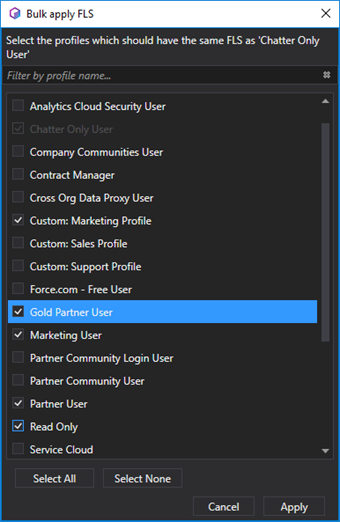
- To apply FLS settings from one field to a set of other fields for all profiles - right-click on the row header of the "source" field and select " Bulk apply to...". In the opened window, select the fields that should have the same settings, as the "source" one, and press Apply.
In case you have changed your decision and need to roll the settings back for a profile or a field to those that were loaded initially from Salesforce Org - just click on the " Reset" button in the profile column header, or in the "Quick Actions" for the corresponding field.
Are these options covering all your use cases? Let us know in the comments, or on the forum which bulk actions we should add to make your life easier!
Highlighting
With such amount of data in a single table, it is crucial to clearly recognize any changes or items that may require your attention. This why TWS's FLS Editor provides you with two different highlighting features:
- Once you change any of your FLS settings - the corresponding cell (or cells) will be highlighted in a different background color.

- If you have just added a new field via XML file and all its permissions are set to "Forbidden", or if due to any other reason all the FLS for a field are set to "Forbidden", this might warn you that you need to think about that field, and work with its permissions. It will be even easier to find such fields, as the entire row containing them will be highlighted with a light red background.

Getting help
In case you need more information on how to work with the FLS functionality, you can always visit our documentation or click the  Help icon in the right side of the editor's toolbar.
Other changes:
In addition to the work on the presented new feature our developers have done more changes.
Now you have an ability to create Lightning Token, Event, and Interfaces directly in The Welkin Suite IDE. This is available for you in the context menu in the Solution Explorer, as well in the Lightning Explorer using the 'Add' option.
Beginning from the Spire R4 version of the IDE the Apex Code Assistance functionality recognizes multiple projects in your solution. This means that issues related to suggestions from another project in the Code Completion list, redirections to the block of a code from another project, and similar cases are solved, and Code Assistance will use code from an active project only.
We have included the fix for an absent Code Coverage data to the Spire R4 version of TWS. This was caused by the recent unexpected change in the Salesforce tooling API in patch 14.2.
Also, TWS developers have solved the issue when the list of your tests was empty in the 'Run tests' dialog, even after using the 'Refresh' button.
For the end, we had the reported issue that Code Map for a class was empty if you used the test method with the 'webservice' name. Now everything works correctly.
Full list of changes:
New Features
- Implemented "FLS" tab for the sObjects GUI Editor
- Implemented an ability to use the "Bulk apply to ..." option for FLS for Profiles in the sObjects editor
- Implemented an ability to use the "Bulk apply to ..." option for FLS for Fields in the sObjects editor
- Implemented an ability to change FLS using keyboard only
Improvements
- Added an ability to create Lightning Token, Event, and Interface in the welkin Suite IDE
- Added multiple projects detection for the Apex Code Assistance functionality
Fixes
- Fixed the issue related to the empty list of tests in the 'Run tests' dialog
- Fixed the issue when the Code Coverage data was empty for TWS project
- Fixed the issue when Code map for Apex classes was empty if a method with the 'webservice' name was present in a class


Your comment may be the first